Romantic Beauty: Bridal Hair and Make-Up Tutorial by Tori Harris
March 25, 2015 As we were so thrilled with the Wedding Collection images for our new look website, we just had to share some inside knowledge of how to achieve the look from the very talented Tori Harris. We watched in awe as Tori transformed our beautiful model Amy into a stunning picture of bridal elegance with a romantic low chignon and a timelessly exquisite natural make up look. Below is a step by step tutorial to achieving this sensational wedding day style.
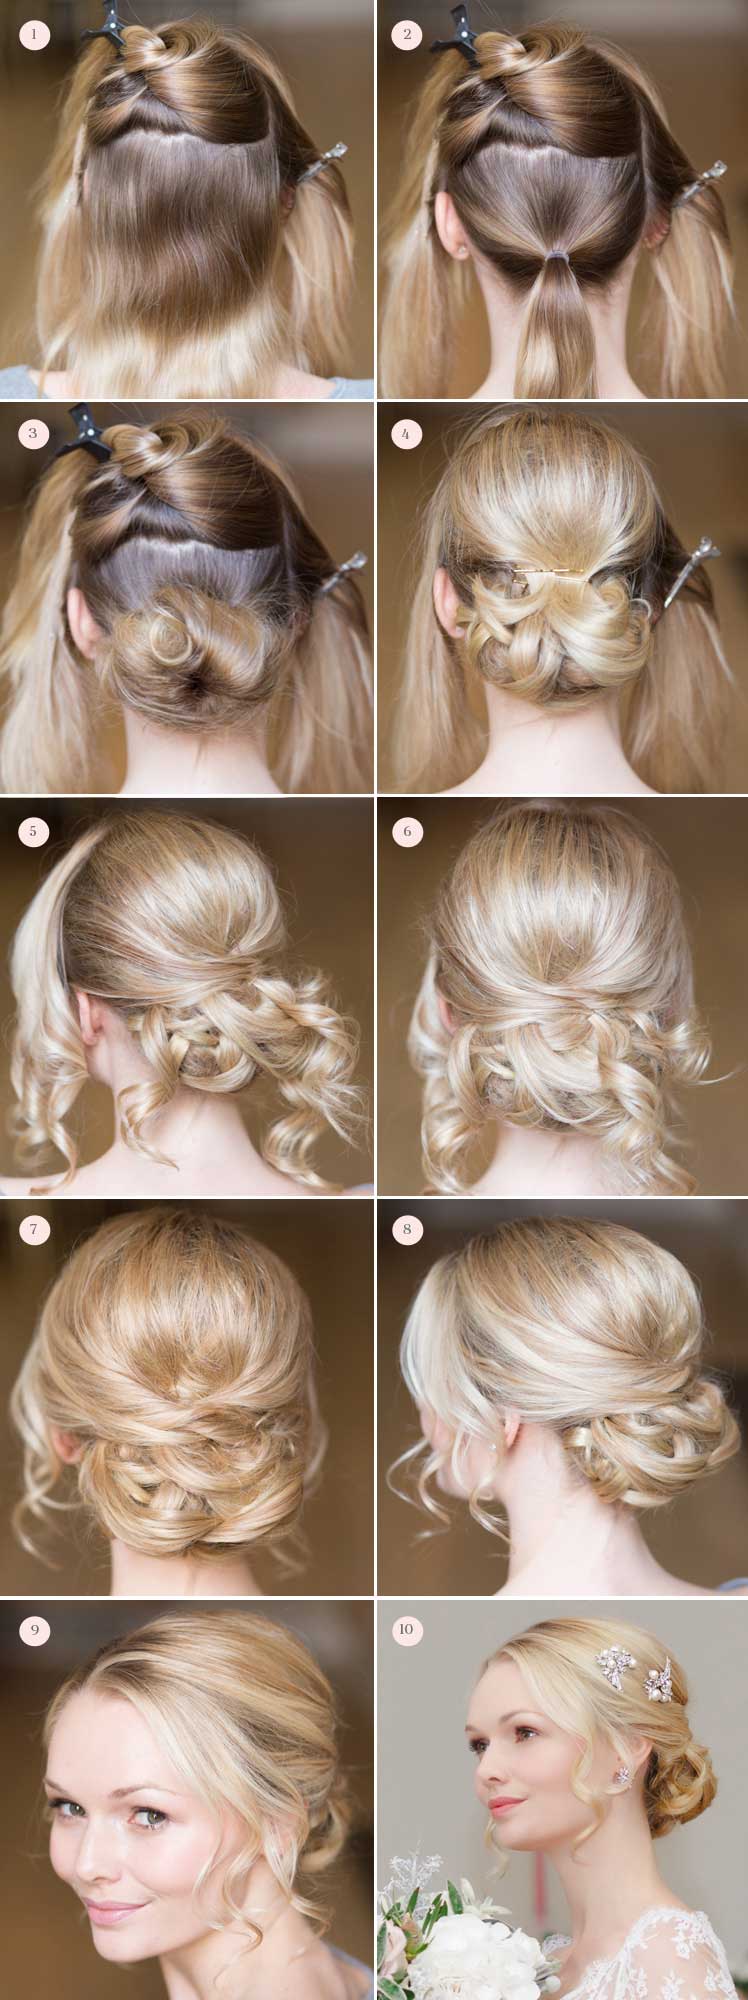
Low Chignon Hair Tutorial

Step 1: Find your parting and section the hair into four sections. Pin the two sides – from the hairline to just behind the ear - and the top half of the back.
Step 2: Tie the remaining hair - the lower section of the back - into a low ponytail.
Step 3: Curl the hair in the ponytail with GHD’s, spray with Bumble and Bumble Thickening Hairspray and backcomb from the tip of the hair to the root to create the stuffing. Pin up into a bun shape.
Step 4: Take the top section of the hair and curl individual sections – gently backcomb the roots and lightly pin into place covering the bun section. I used pins in the middle to hold the height on top.
Step 5: Take the side sections and curl small 1 inch (2.5cm) sections, lightly tease the roots and then pin over the pins from the previous step. Leave the ends of the curls out.
Step 6: Pin in the ends of each of the curls, covering any remaining areas where you can still see the ‘stuffing’.
Step 7: Loosely curl the front sections to finish the look.
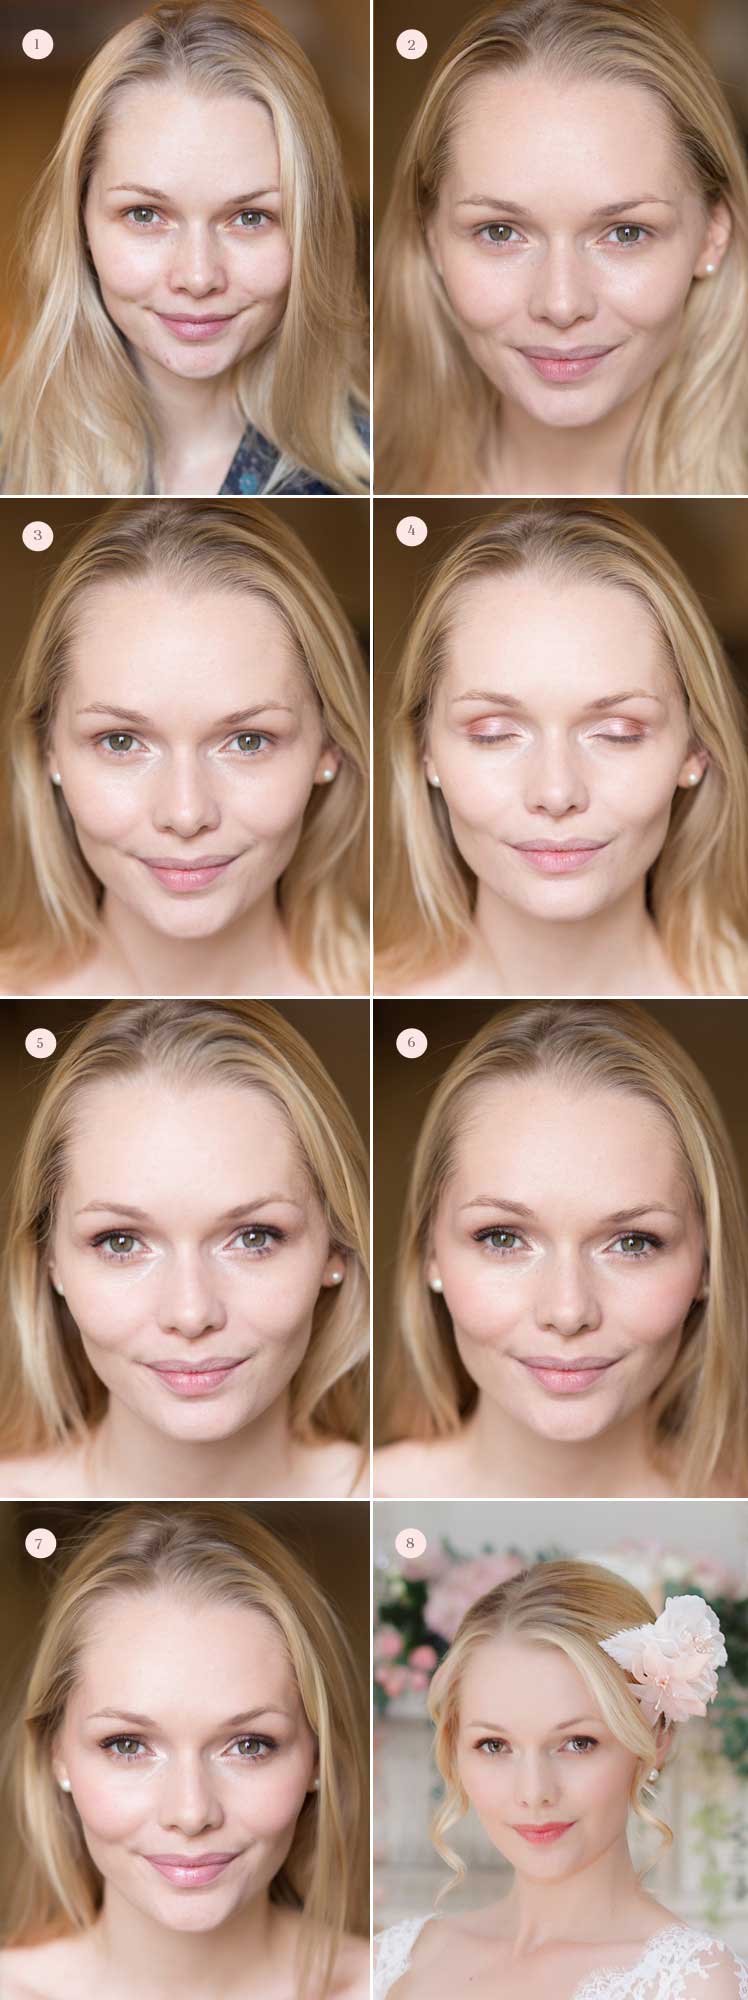
Classic Bridal Make Up Tutorial

Step 1: Start by prepping the skin using your usual cleanser and moisturizer. For a long lasting look ensure you use a primer.
Step 2: Tori used Bobbi Brown Skin Foundation for a light and natural finish before going in with concealer for more coverage where needed. She applied Touché Éclat under the eyes and finished with MAC Mineralize Skin Finish Powder.
Step 3: To shape the face Tori defined Amy’s brows with a clear brow gel before using a light brown powder to slightly define them. On the eyes she used Illamasqua cream eye-shadow – Vintage Metallix in Courtier to create a shimmery base and a highlighter in the corner.
Step 4: To finish the eye-shadow Tori blended MAC Woodwinked into the outer corners creating a soft, golden shimmer. She also blended a little Woodwinked in under the eyes.
Step 5: As Tori wanted Amy’s eyes to be naturally defined she used a soft brush to blend a little of Bobbi Brown’s Gel Liner in Sepia along the lash line. For full and defined lashes she used plenty of mascara and then topped up with individual lashes from Eylure.
Step 6: To warm up the skin Tori used MAC So Sweet So Easy Cremeblend Blusher on the apples of the cheeks and then a light dusting of Benefit Coralista to finish. To create a soft dewy look she added Illamasqua Gleam in Auroa to the cheeks and under the eyebrows.
Step 7: To finish the look Tori used MAC lipstick in Angel.
For enquiries about your wedding day hair and make-up, please contact: Tori Harris Make-Up Artist & Hair Stylist


